
Product photoshoot lighting: the short answer
A DTC fashion brand raised a seed round last year and decided to "do things right" for once. They booked a proper photographer, hired models, rented a studio, the works, for one collection of 40 pieces. Total spend: $12,347. Then they A/B tested the new photos against their old setup, clothes hung on hangers against a white wall, shot on an iPhone. The iPhone shots converted at 3.2%. The $12K professional shoot converted at 2.7%. One of the three reasons the seller identified afterward: the lighting was too perfect, and it made the fabric look different than it actually was, which meant more returns (r/ecommerce).
That's the thing nobody tells you before you go shopping for product photoshoot lighting: more expensive doesn't automatically mean better. Good lighting has to match the product honestly, or it costs you in returns and trust, no matter how much you spent on the gear.
TL;DR: Product photoshoot lighting comes in three real tiers, budget DIY (a lightbox tent or window light), mid-range (continuous LED + softbox), and pro (strobe-based multi-light studio setups). Match the tier to how often you're shooting and what you're shooting, not to what looks impressive. And if you don't want to buy gear at all, an AI tool can generate a lit, marketplace-ready photo from one clean base shot, a legitimate option, not a downgrade.
Key definition: Product photoshoot lighting is the arrangement of light sources, natural or artificial, used to photograph a product for ecommerce listings, so color, texture, and detail render as accurately and appealingly as the physical item.
Why lighting makes or breaks a product photo
Every lighting decision comes down to one variable most guides skip: hard light versus soft light. Hard light is what you get straight out of the box from almost any light source, a harsh point of light that creates sharp shadows and blown-out highlights. Soft light comes from making that light source effectively bigger, by moving it closer, passing it through a diffuser, or bouncing it off something. The bigger the light source relative to your product, the softer and more flattering the result.
This isn't just a technical detail, it's the actual reason product photos look "off." Hard, direct light flattens texture and can shift colors, a deep red fabric can photograph closer to orange under the wrong light. Soft, angled light shows texture and holds true color. That's the difference between a listing photo a buyer trusts and one that gets the product returned because "it didn't look like this in the photo."
Key insight: The single biggest lighting mistake in product photography is treating "brighter" as "better." A harsh, direct light source doesn't just look unflattering, it actively misrepresents color and texture, which is a returns problem, not just a style problem.
Budget tier: DIY product photoshoot lighting setup
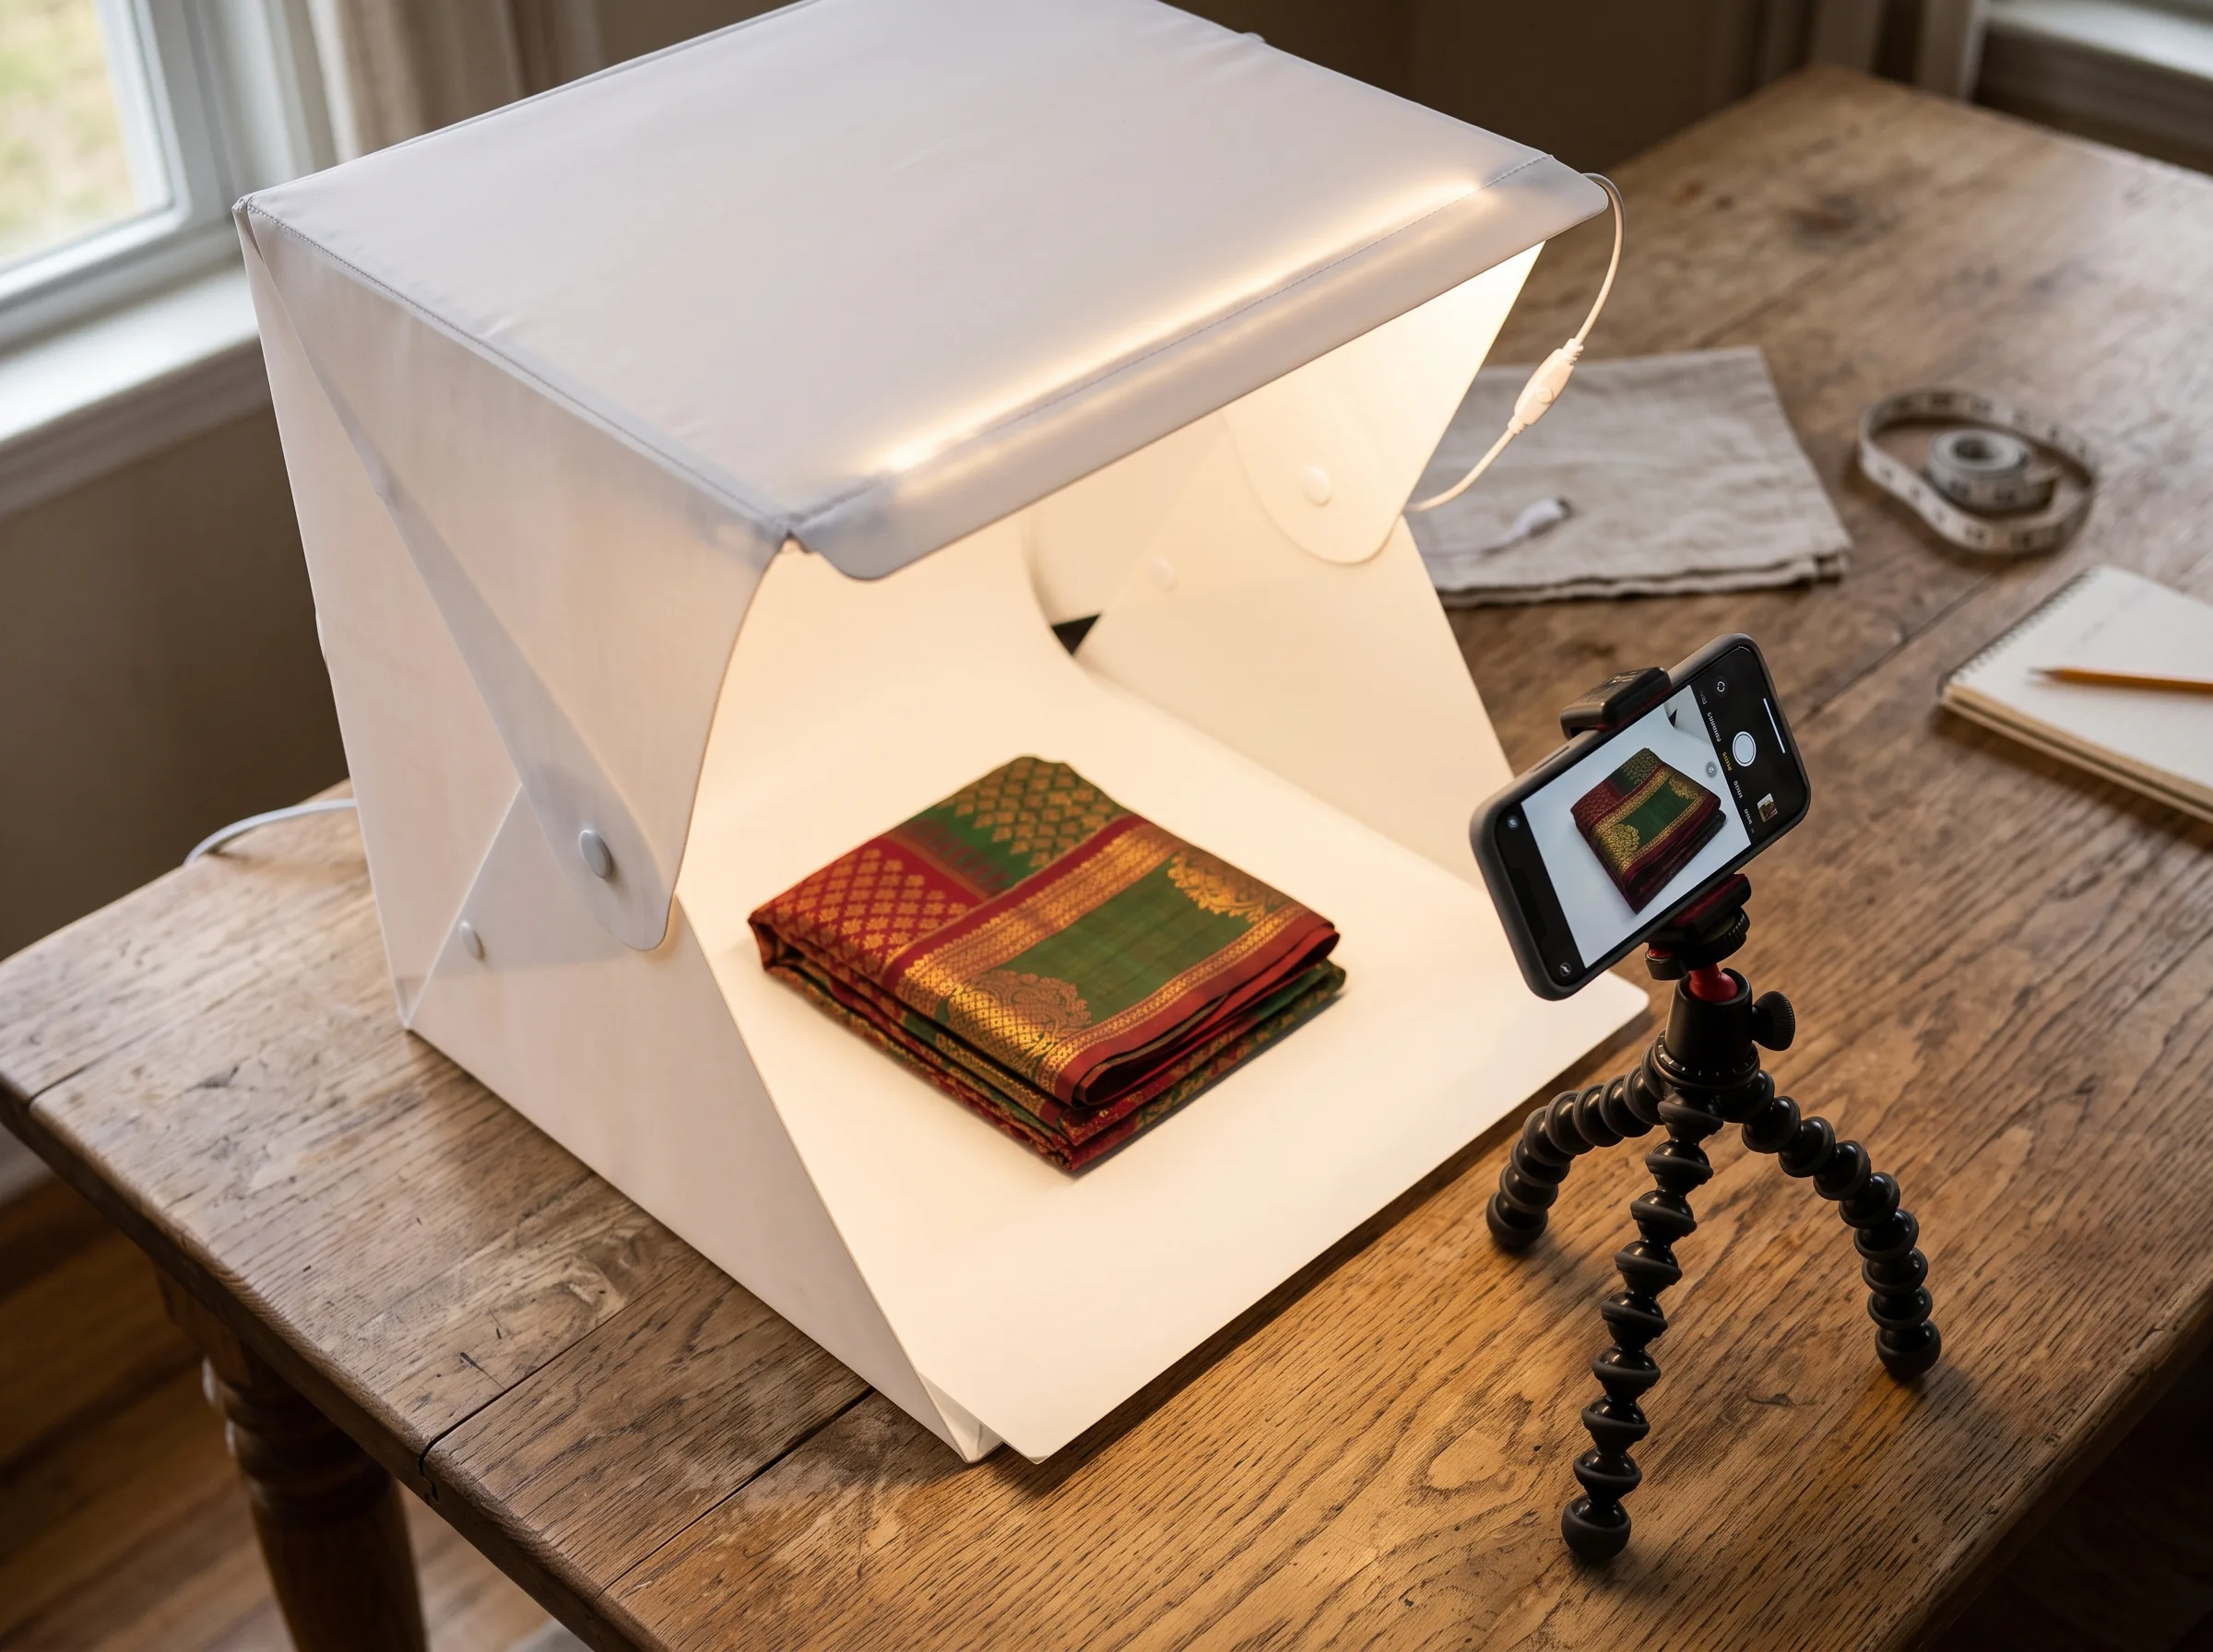
If you're shooting a handful of SKUs and testing whether a product sells before investing further, start here. A foldable lightbox for product photography, sometimes sold as a "photo tent," is a collapsible box with a built-in LED strip and interchangeable white and black backdrops. One Jaipur camera store demo showed a basic version priced like a cheap accessory, not a real investment, genuinely enough for flat-lay shots of jewelry, small accessories, or a single SKU (per a demo from Subransu Camera Store, Jaipur). Exact pricing varies by seller, so check current listings rather than treating any single number as fixed.
The other zero-gear option is a large window with indirect daylight, no direct sun, and a plain white foam board as a reflector to bounce light back into shadows. This costs nothing beyond the board and works well for flat lays and simple shots. The tradeoff is consistency: daylight changes with the hour and season, so photos shot months apart won't color-match.
This tier is right for a seller who's still validating a product or running a small Meesho or Instagram shop with a handful of listings. It's the wrong tier once you're shooting the same 40-piece collection every quarter and need repeatable results.
Mid-range tier: softbox and continuous lighting kits
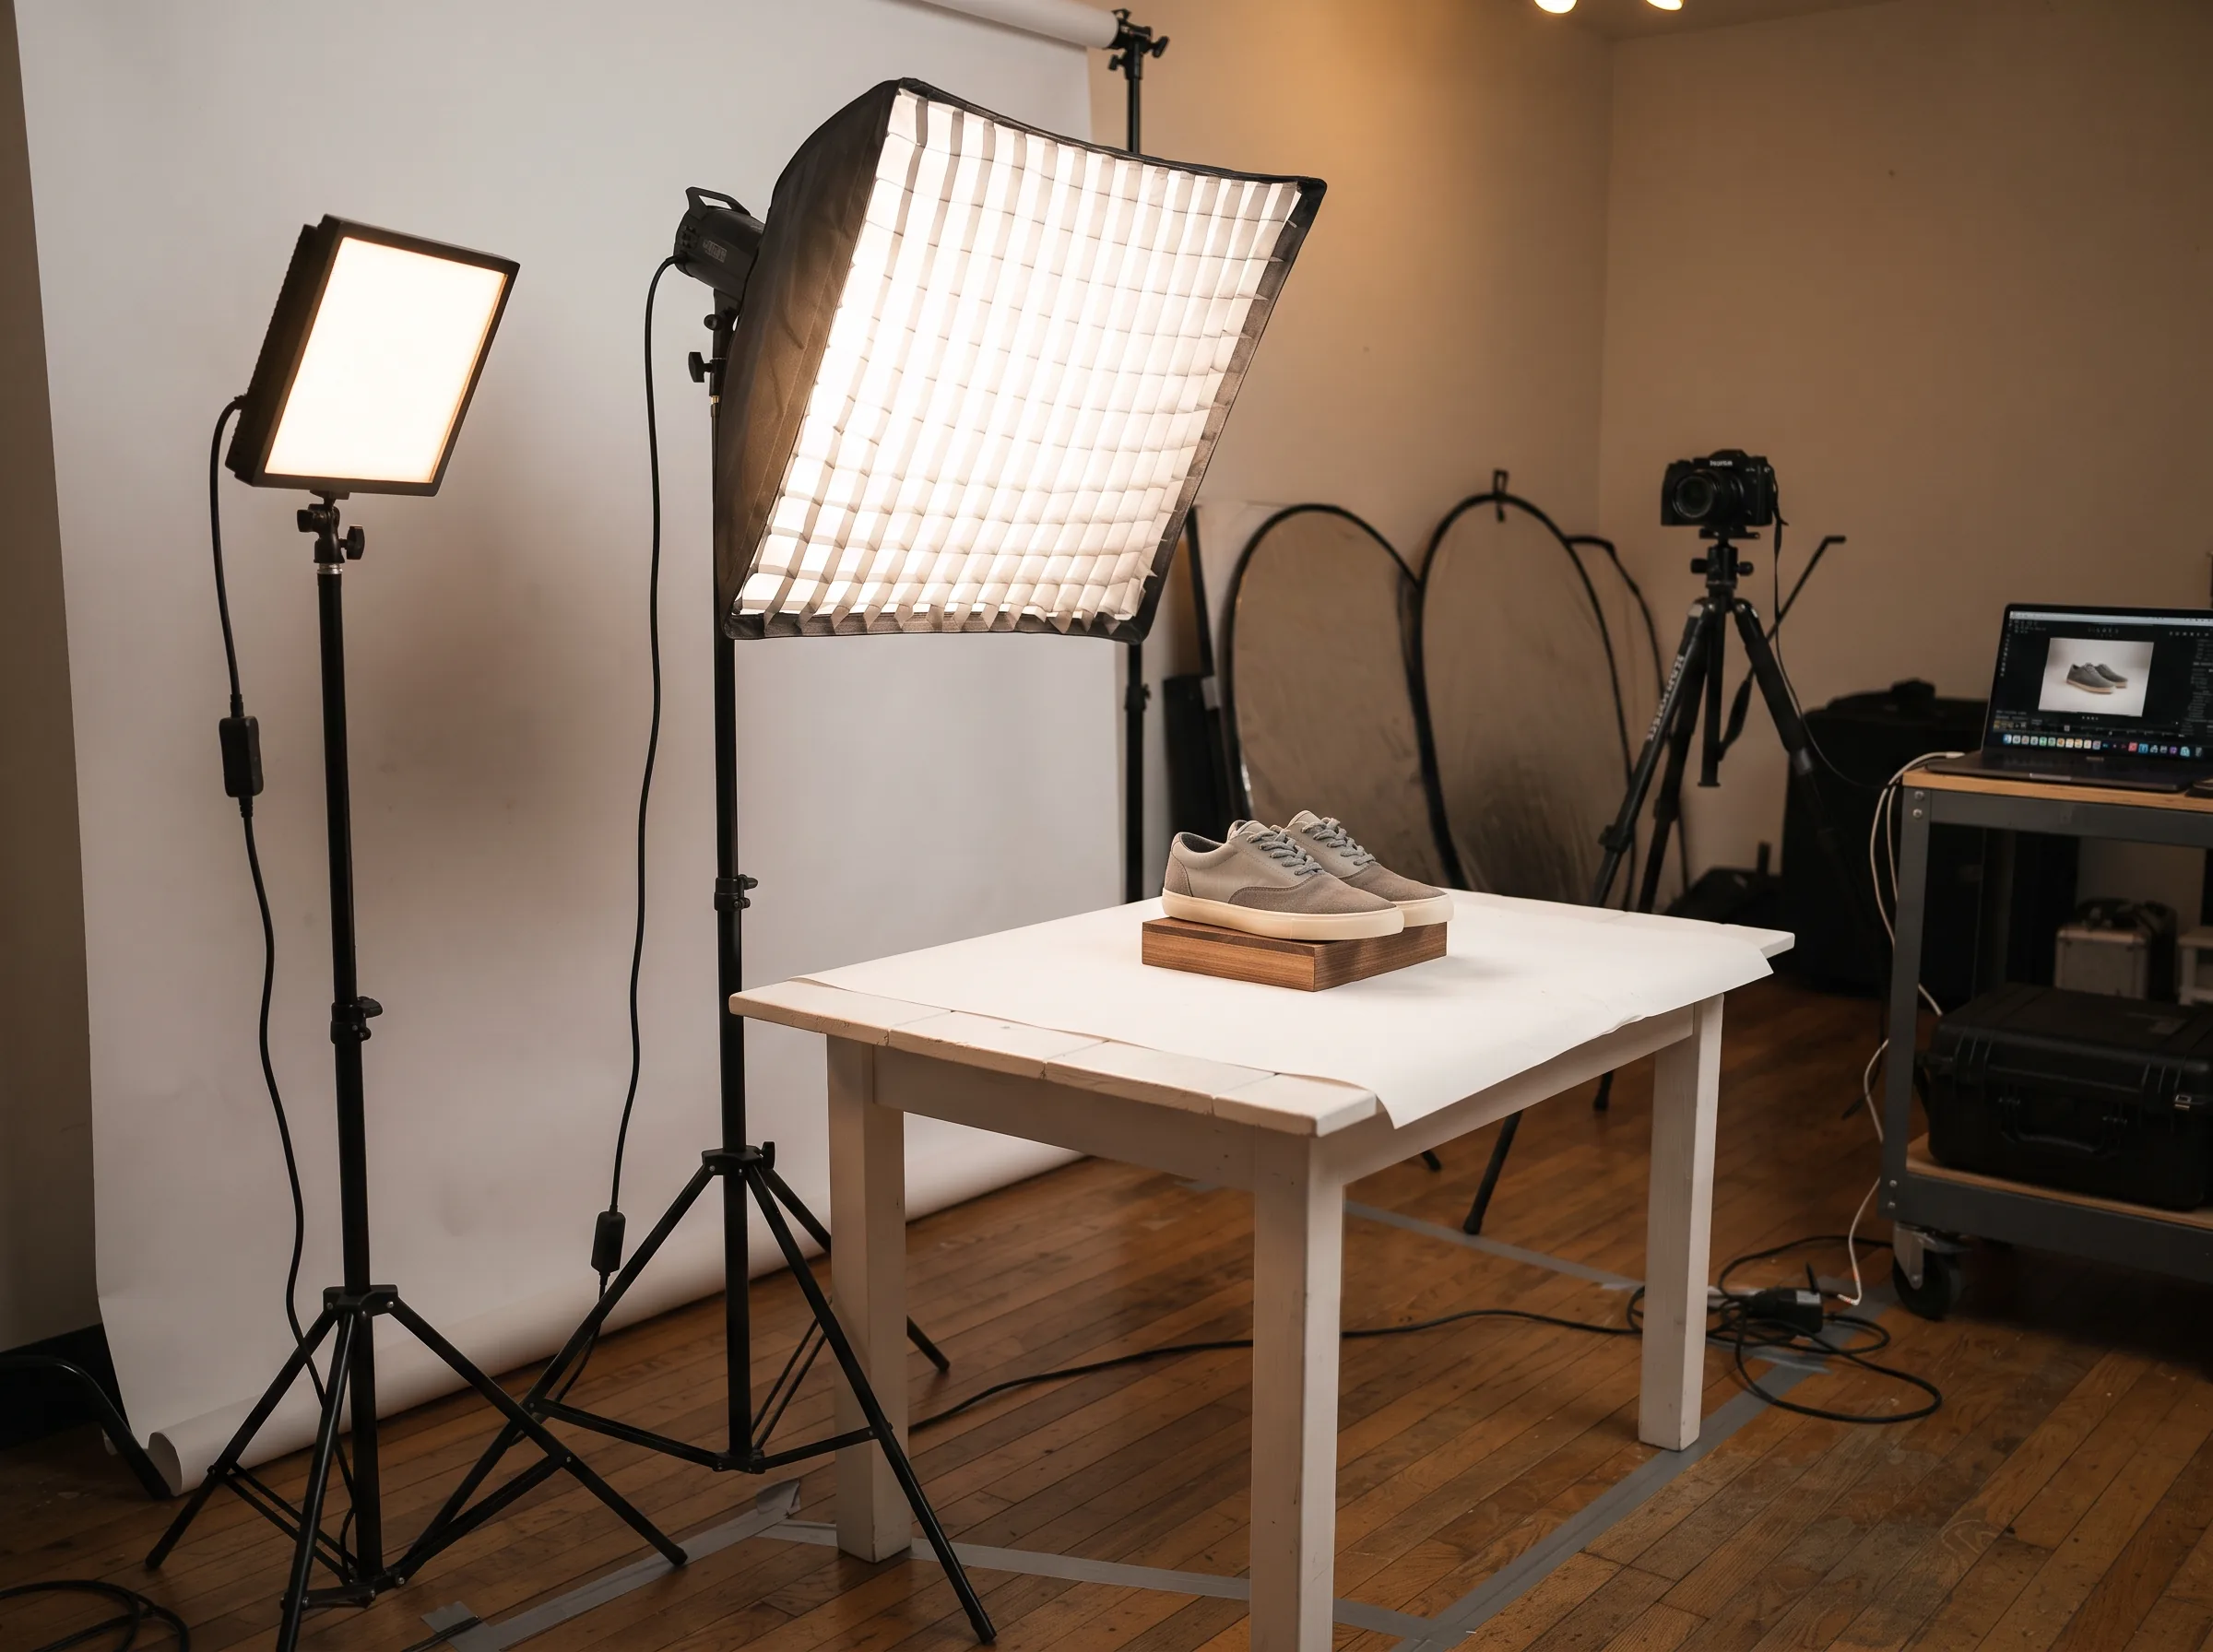
This is the tier most manufacturers and marketplace sellers should actually be buying into. A continuous LED light, one that stays on so you see exactly what you're getting before you shoot, paired with a softbox modifier, gives repeatable, controllable light without a steep learning curve. A beginner-friendly continuous light in this category is genuinely "what you see is what you get," useful when you're shooting fifteen SKUs in an afternoon and can't afford to guess.
The softbox does the same job as the window and foam board from the budget tier, just more consistently. A bigger softbox gives softer light, and moving it closer to the product does too, the same size-and-distance rule that governs all of this. The tradeoff is space and cost, but it pays for itself the moment you're not redoing a shoot because the light was uneven.
This is the setup for a seller running a monthly or quarterly catalogue update, reusable equipment you'll use for years, not a one-off rental.
Pro tier: strobe lighting and studio setups
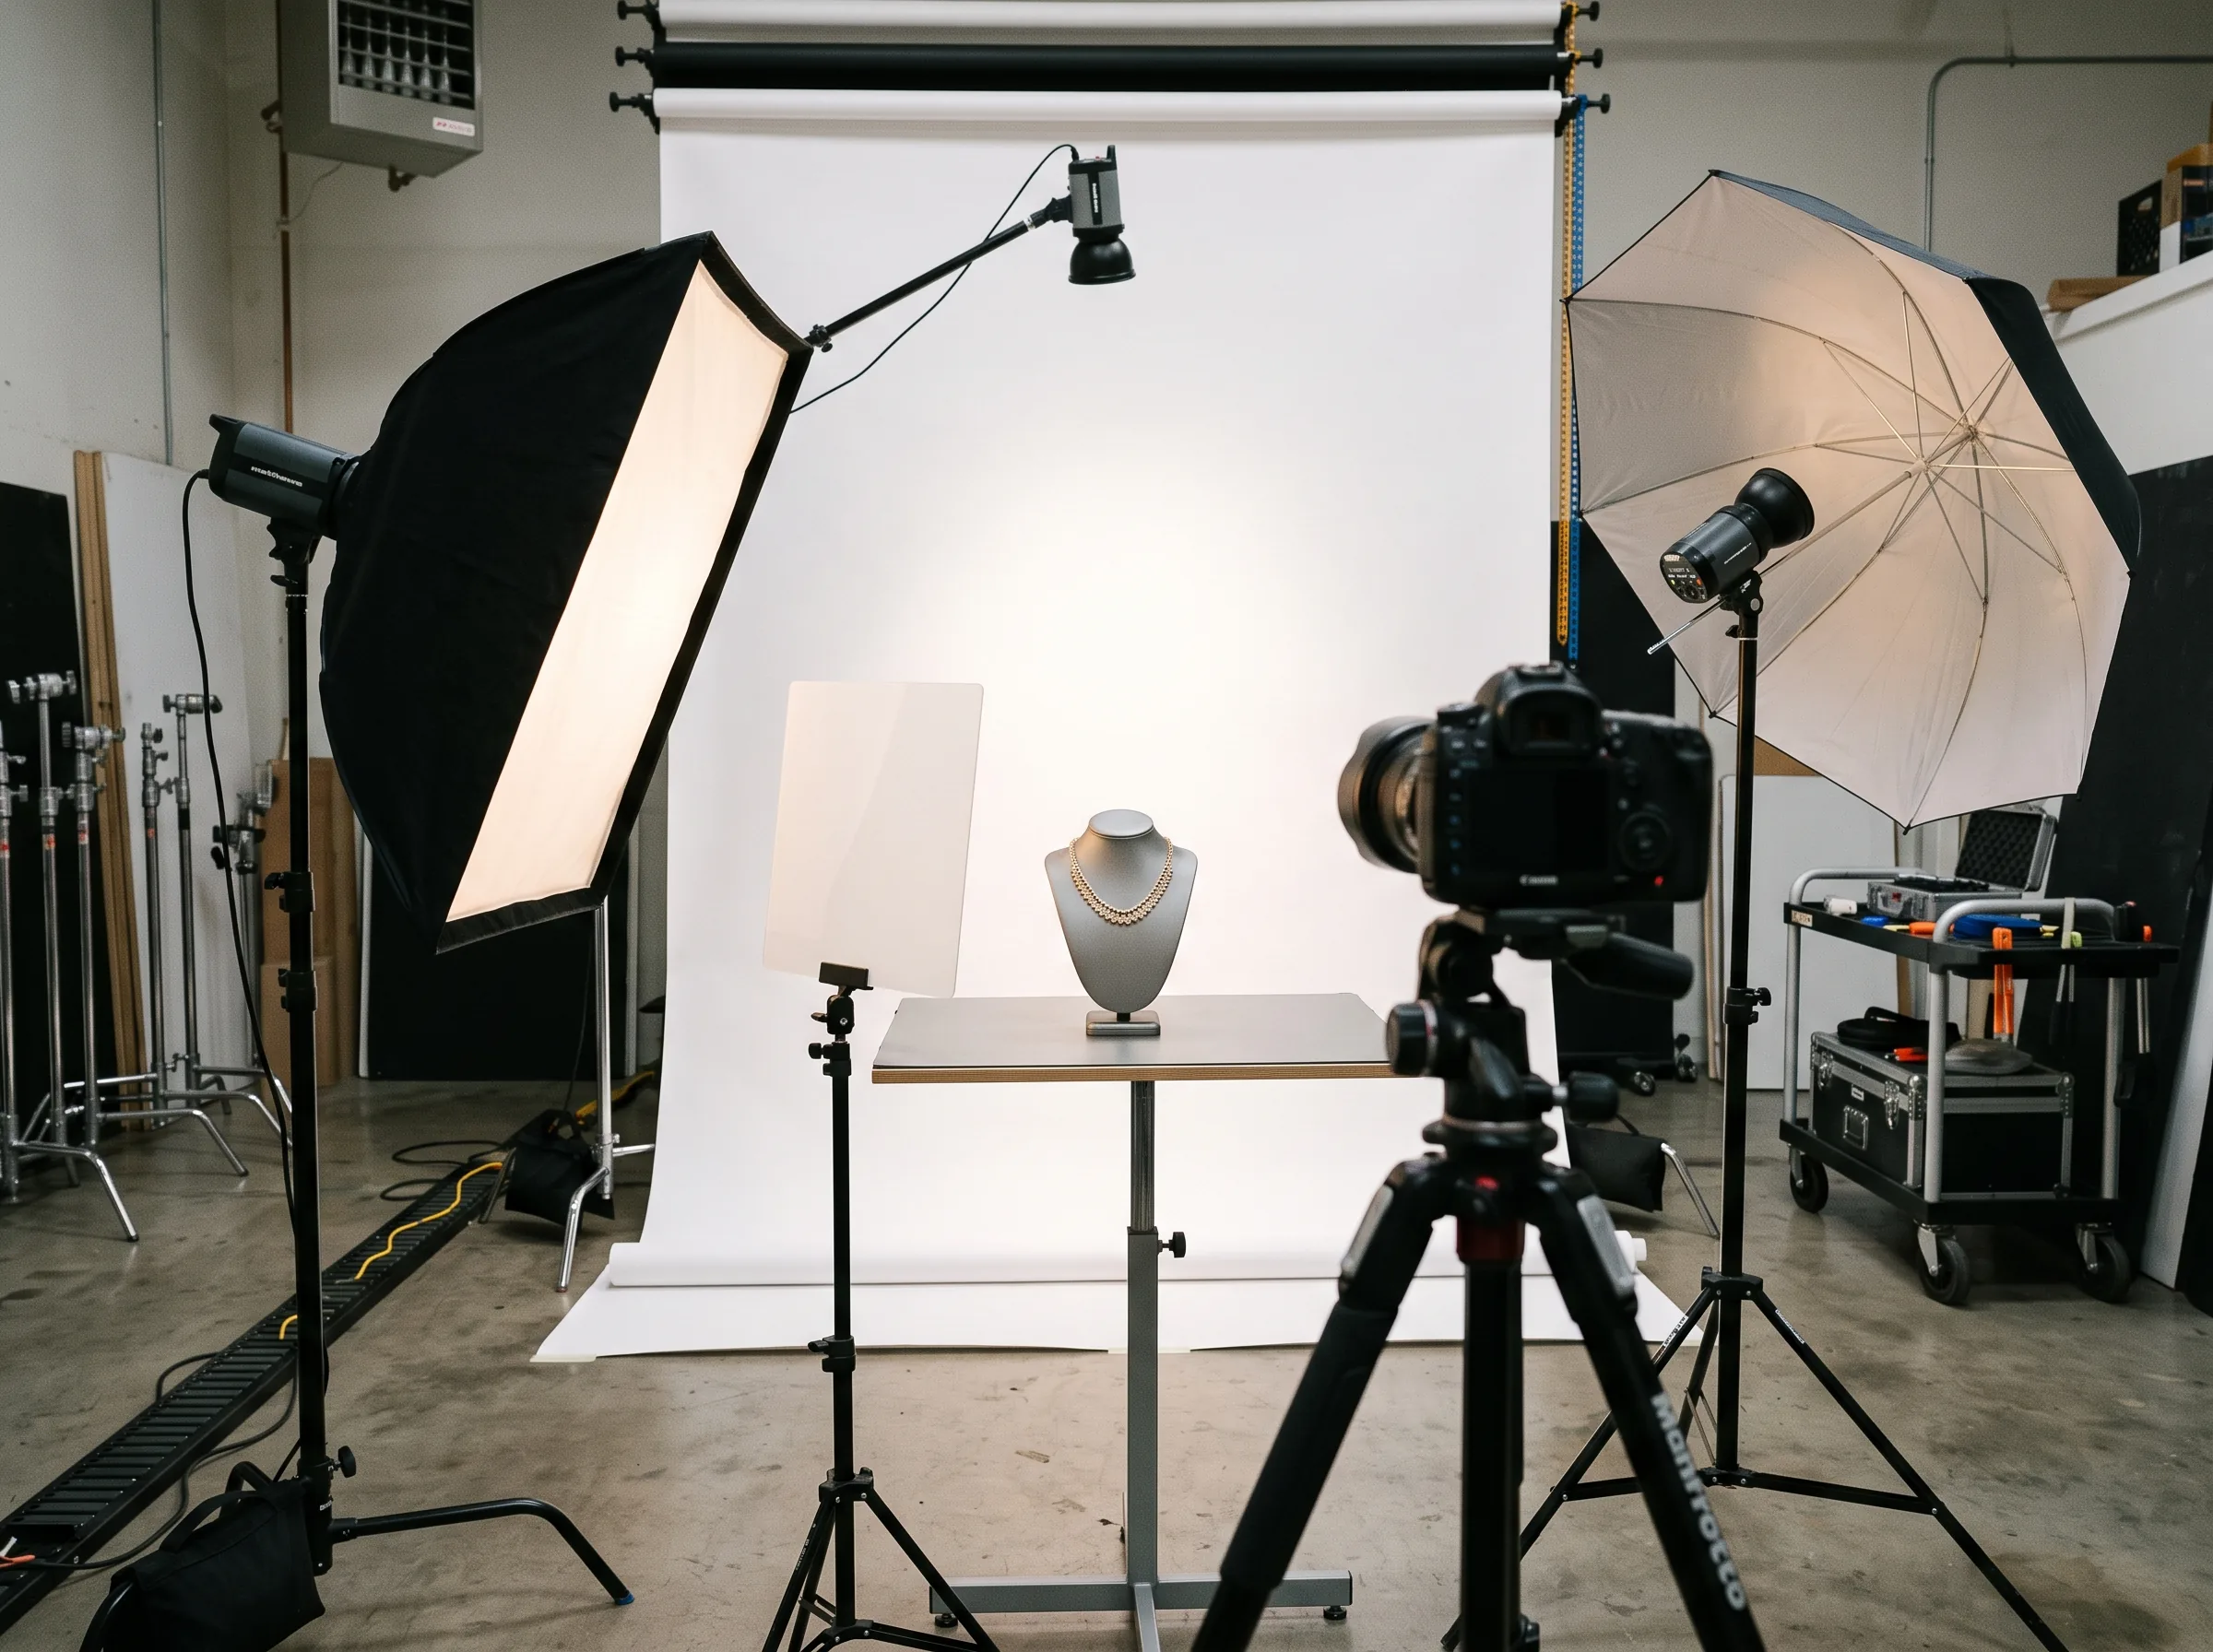
Strobe (flash) lighting is the step up from continuous light for sellers running a dedicated in-house studio across a large catalogue. An entry-level flash unit gives more power and lets you freeze motion and overpower ambient light, useful when shooting hundreds of SKUs with consistent output regardless of the room's existing light.
At this tier, you're usually running a proper three-point setup: a key light, a fill light to soften shadows, and a separate light for the backdrop so it stays evenly lit. For reflective products, jewelry, glass, metal hardware, add a diffusion panel or paper roll to control reflections, since a bare light source will just bounce straight back at the camera as a hot spot.
This tier makes sense for a manufacturer with a real studio and a steady volume of shoots. It's overkill if you're shooting a dozen SKUs a month, the cost and the learning curve outweigh what you'll get back.
The real problem: reshoot fatigue across marketplaces
Here's what a good lighting setup doesn't solve. A garment manufacturer in Surat listing across Amazon, Flipkart, Meesho, and Myntra deals with four different image specs, background rules, and required angle counts. Even with a perfectly lit source photo, satisfying every platform's catalogue rules usually means re-editing, sometimes re-shooting, per platform.
That's a workflow problem, not a lighting problem, and it's exactly why buying better lights alone doesn't fix the real time drain. A new SKU drop that sits half-listed for two weeks while photos get re-cropped and re-edited for each marketplace is losing its selling window against competitors who list faster. Good lighting gets you one clean photo. It doesn't get you four platform-ready versions of it.
Direct answer: No, better lighting gear alone doesn't solve the multi-marketplace reshoot problem. It fixes image quality on a single shoot. Getting that one shoot into four different platform-ready formats still takes separate editing or an AI tool built for it.
Or skip product photoshoot lighting entirely: the AI option
If the gear cost is giving you pause, or the $12K story above sounds uncomfortably close to a risk you don't want to take, there's a legitimate third option: skip the physical lighting rig and generate the lit, marketplace-ready photo instead.
This isn't a replacement pitch for real photography. If you're shooting jewelry, glass, or anything where exact light behavior on a reflective surface matters for a hero shot, a real lighting setup still earns its keep. But for a seller who doesn't want to buy a softbox kit, backdrop, and light stand for every new product line, and who's more worried about reshoot fatigue across four marketplaces than owning gear, AI product photography is a real answer, not a downgrade.
Scalio works from one clean base photo of your product and a short brand brief, and generates model-wearing shots, flat-lay variants, and platform-ready crops without a studio booking, a lighting kit, or a reshoot every time a marketplace changes its spec. You're solving the same lighting problem (making the product look accurate and appealing) and the reshoot-fatigue problem from the section above, at the same time, from photos you already have.
A Surat seller's lighting decision
Picture a mid-size garment manufacturer in Surat weighing two options for the season's new arrivals. Option one: buy a mid-range softbox and continuous LED kit, a few thousand rupees, reusable for years, shooting every SKU in-house. Option two: shoot each piece once in decent light, then generate the marketplace variants, flat-lay, model-wearing, platform crops, through an AI tool instead of re-lighting for every platform spec.
The practical split: keep the mid-range setup for hero shots and flagship pieces where getting the lighting exactly right still matters, and lean on AI-generated variants for fast-moving SKUs where the priority is getting listed on all four platforms this week, not next month.
Which lighting setup should you actually buy
If you're testing a handful of SKUs and learning as you go, start with a lightbox for product photography or a window and a reflector, no real investment needed. If you're running a monthly or quarterly catalogue update, a mid-range softbox and continuous LED kit pays for itself fast. If you're running a dedicated studio across a large catalogue, especially jewelry or reflective products, a pro strobe setup with proper diffusion is worth the learning curve. And if your real bottleneck is reshooting the same product for four different marketplace specs with no time to spare, skip the rig and generate what you need from a photo you already have.
Turning better light into better listings
Product photoshoot lighting isn't about buying the most expensive kit, it's about matching the setup to how often you shoot and what you're shooting, and being honest that a physical rig alone doesn't solve the reshoot-across-marketplaces problem. For more on what actually goes wrong beyond lighting when you're prepping listing photos, see our guide to AI prompts for product photography, and if you're specifically prepping for Myntra's onboarding checklist, our Myntra photoshoot requirements guide covers the platform-specific rules. Fabric-heavy sellers can also check our saree product photography guide for draping and zari-lighting specifics.
Scalio turns a product photo and brand context into model-wearing photos and Reels in minutes, replacing the shoot, the studio, and the agency retainer. From ₹999/month (100 credits) against a ₹10,000+/month agency. See how it works →
Frequently Asked Questions
What is the best lighting setup for product photography?
It depends on how often you're shooting. A foldable lightbox with built-in LED works for occasional shoots of a few SKUs. A continuous LED plus softbox kit suits a regular monthly or quarterly catalogue update. A strobe-based three-point setup suits a dedicated in-house studio running a large catalogue. There's no single best setup, match the tier to your shooting frequency.
Do I need a softbox for product photography?
Not always. A softbox diffuses and enlarges the light source, which is what makes the light soft and flattering, especially on fabric and reflective surfaces. For simple flat-lay shots, a diffuser panel, a large window with indirect daylight, or even a bedsheet stretched over a light source can approximate the same softening effect without buying a dedicated softbox.
Is natural light good enough for product photos?
Yes, for many sellers just starting out. It costs nothing beyond a reflector board and can look genuinely good. The catch is consistency, cloud cover, time of day, and season all change the light's color and intensity, which makes it hard to keep photos matching across a growing catalogue. Artificial lighting costs more upfront but gives you the same result every time you shoot.
Can bad lighting hurt my product listing's conversion rate?
Yes, in both directions. Harsh or under-lit photos look unprofessional and hide detail, but overly polished, perfectly lit photos can also backfire if they make the product look different from reality. Customers who feel misled return the item, which is exactly what happened in a widely discussed case where a brand's $12,347 professional reshoot converted worse than its old iPhone photos (r/ecommerce).
What's a cheaper alternative to buying lighting equipment?
An AI product photography tool can generate a lit, marketplace-ready image from a single clean base photo and a brand brief, skipping the equipment purchase entirely. It's a genuine option for sellers who don't want to invest in a lighting kit for every new product line, though a physical setup still makes sense for hero shots or reflective products where exact light behavior on the surface matters.